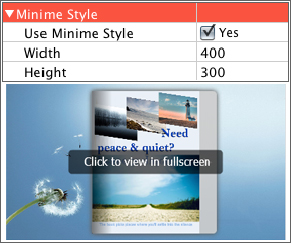
Template Settings Interface
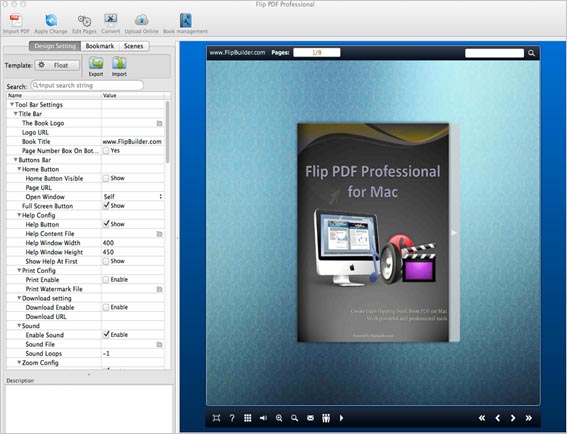
After importing PDF, you will see the main Template Design and Preview interface. Four tabs in the design panel for you to design template, choose scene, and define bookmark.

The below instructions will show you details of these tab settings:
1. Design Setting—Choose Template
2. Design Setting—Toolbar Settings
3. Design Setting—Flash Display Settings
4. Design Setting—Flash Control Settings
5. Bookmark Editing
6. Scenes Setting
1. Design Setting—Choose Template:

Click![]() icon to select templates from below interface:
icon to select templates from below interface:
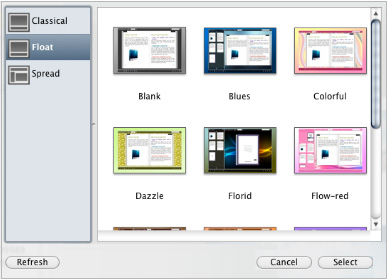
Ps,
![]() Click this icon is to save current settings as a TXT file for later uses;
Click this icon is to save current settings as a TXT file for later uses;
![]() Click this icon is to import stored setting file at once.
Click this icon is to import stored setting file at once.
You can download themes from our website to import and use: http://www.flipbuilder.com/templates-themes/theme.html .
2. Design Setting—Tool Bar Settings:

(1) Title Bar
The "Book Title" only can be set in Float template, but you can set logo in both Float and Neat templates. You are enabled to set the book title as HTML format text.
For example: set "<a href='http://www.flipbuilder.com' target='_blank'>FLIPBUILDER.COM</a> | <font color='#ff0000' size='14'>Red Color</font> " to show title as below image shows:

(2) Buttons Bar
i. Full Screen
![]()
To enable "Full Screen" functionality in output flipbook, check "Show" in "Full Screen Button" option.
Then you can click icon ![]() to view flipbook in Full Screen, click icon
to view flipbook in Full Screen, click icon ![]() or "Esc" button to exit from the Full Screen.
or "Esc" button to exit from the Full Screen.
Or if you want to show your flipbook without Tool Bar while showing in Full Screen mode, you can set "No" in "Full Screen without Tool Bar" (just in Classical Template):
![]()
ii. Help Config
![]()
To show tips about viewing flipbook, you can set "Show" in "Help Button" option, and you can define Help Content manually by inserting "Help Content File (image or SWF)", also enable to define the Width and Height of the Help image or swf. If you set "Book->Retain the book to center->No", you can set "Show Help At First->Show" to display the Help Panel with the Book as below:
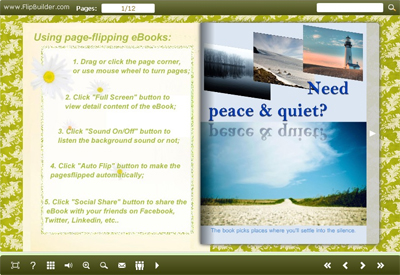
You can also click the button ![]() to view the same Help page in pop-up window.
to view the same Help page in pop-up window.
iii. Print Config

Check "Print Enable->Enable", you can set "Print Watermark File" to add a logo or other kinds of watermark (image or SWF) only show in print out pages but won't show while viewing in eBook.
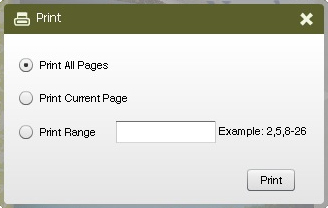
Click icon ![]() to set print page range as below:
to set print page range as below:
iv. Download setting

If you want your flipbook readers to download the PDF file or the flipbook directly from your website, check "Download Enable->Enable" option, then input the Download URL directly, you can use absolute path like "http://www.flipbuilder.com/flip-pdf/example/files/download/FlipPDFDemo.pdf" or relative path like "/files/download/FlipPDFDemo.pdf" (make sure you have uploaded the PDF to the same path).
Then readers can click the icon ![]() to download your uploaded PDF file directly.
to download your uploaded PDF file directly.
v. Sound Panel

If you want to add background sound to your flipbook, such as a song or other audio file, check "Enable Sound->Enable", then click Open Folder icon to choose "Sound File" from your computer, then set "Sound Loops", "-1" stands for playing the sound file all the time while viewing flipbook, other value (N>0) stands for the times of playing the sound file.
vi. Zoom Config

To Enable Zoon In functionality, check "Zoon in enable->Enable", then set "Minimum zoom width" and "Maximum zoom width" as zoom scale directly.
vii. Search

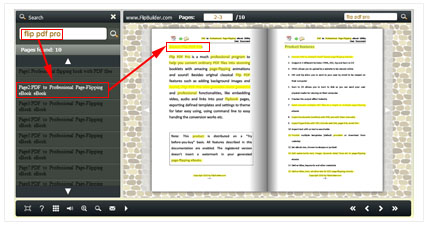
Select "Show" in "Search Button" (make sure you have check "Enable Search" option in "Import PDF" interface), then define "Search Highlight Color", after clicking "Search" icon![]() , you will see a popup box to input search words, then click Enter or "Search" button, you will get the below searching result:
, you will see a popup box to input search words, then click Enter or "Search" button, you will get the below searching result:
viii. Share
a. Share Button
If you want readers to share via Email, you can enable "Share" feature as below shows:

When the viewers click the share button ![]() , they will enter into the Email interface with the link of your flipbook in the Email body.
, they will enter into the Email interface with the link of your flipbook in the Email body.
b. Social Share
If you want your flipbook viewers to send the link to their friends or clients via Facebook, Twitter, Linkedin, Google, Yahoo and so on, you can add a Social Share button in your flipbook for readers to send out your flipbook link immediately:
![]()
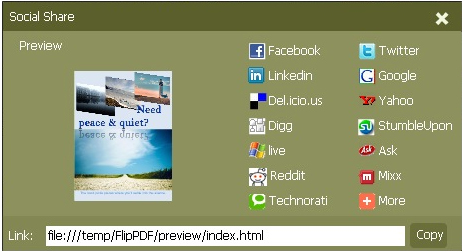
The readers just need to click the "Social Share" button ![]() , then the below window will pop up for them to choose share channel:
, then the below window will pop up for them to choose share channel:
ix. Auto Flip

To auto flip your eBooks, you can check "Auto Flip->Enable" option; then define the Flip Interval (seconds of staying on each page); the value of "Play Count" stands for the times of auto playing the eBook, and "-1" stands for playing forever (after clicking the Auto Flip button ![]() , the flipbooks will be flipped by staying 3 seconds per page); if you want to auto start and flip the eBook after opening, just set "Auto flip when start up->Yes".
, the flipbooks will be flipped by staying 3 seconds per page); if you want to auto start and flip the eBook after opening, just set "Auto flip when start up->Yes".
x. Language Button

You can set language for showing tools or tips in your created flipbook, click setting button to enter into the Language Settings interface as below shows:
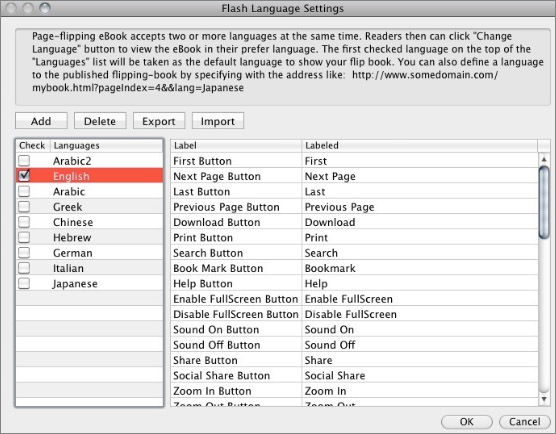
As the tips explaining, the "Labeled" column lists the buttons and instructions on Flash books in defined language, and the program provides you five different languages for you to use: English, Chinese, Arabic, Greek, etc. you can drag the language label to adjust language layer order, the first checked language on the top of the list will be taken as default language to show the book.
You can also add other language for your own uses:
a. Click the button "Add" and define name for the new language;
b. Choose the first label and click "Edit" icon, define new language text in "Labeled" box, then click "Save And Edit Next";
c. At last, you can get all Labels translated into your new language.
You can delete unwanted language, or export your edited new language file as XML or TXT file, or import language file saving before for current using.
xi. Add Annotations
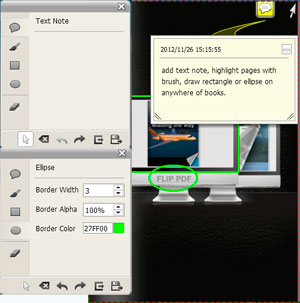
To help readers take notes on your books while reading, you can set "Add Annotation->Enable". When readers view your book on computer, they can click "Add Annotation" icon![]() to add text note, highlight pages with brush, draw rectangle or ellipse on anywhere of your book pages. If they open the book next time, they can view the comments, or delete as they want:
to add text note, highlight pages with brush, draw rectangle or ellipse on anywhere of your book pages. If they open the book next time, they can view the comments, or delete as they want:
(3) Button Icons
i. Icon Color
![]()
ii. Icon File (SWF Only)
Select the Tool Bar Button to replace with your own icon.
![]()
More details please view here:
3. Design Setting—Flash Display Settings:
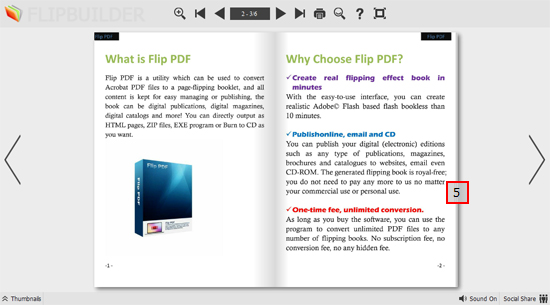
(1) Pages thickness (only in Neat template)To create more real life like ebook, you can set Pages thickness, there are 5 levels for you to choose based on your needs: None, Thinner, Thin, Thick and Thicker. On the book edge, you can see different page number tips for you to click and go to that page directly:
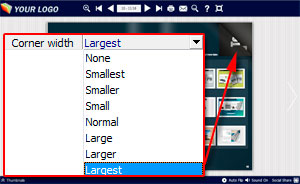
(2) Corner WidthYou can define corner flip width in "Corner width" setting box, there are 8 levels for you to use:
(3) Background Alpha
Set the value (0-1) of alpha to control the transparence of the background in flip book. For example, you can set the value as 0 to make the book background as transparent completely, when you embed the book in other HTML page, it will show the background of that HTML only. (4) Retain the book to center |
4. Design Setting—Flash Control Settings:
(1) Links
If you have check "Import links" option in "Import PDF" interface, choose "Mouse over color", "Link alpha" (refers to the link area opacity, value interval: 0~1, "0" stands for the area is totally transparent), and "Open Window->Blank/ Self". The links also can be clicked after zooming by setting "Enable after Zooming in->Enable".
(2) Google Analytics
In the HTML output format, you can add statistics by using google analytics. You can get more information about Google Analytics ID from http://www.google.com/analytics/ .
5. Bookmark Editing:
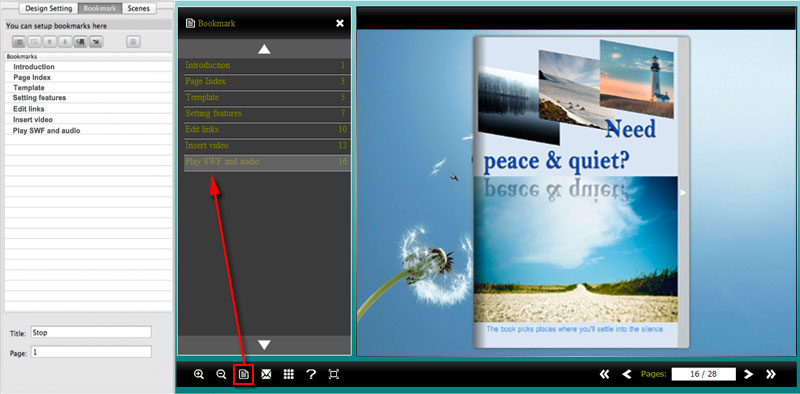
You can check "Import Bookmarks" option in Import PDF interface if your PDF contains bookmarks, or you can edit bookmarks directly in the program:
6. Scenes Setting:
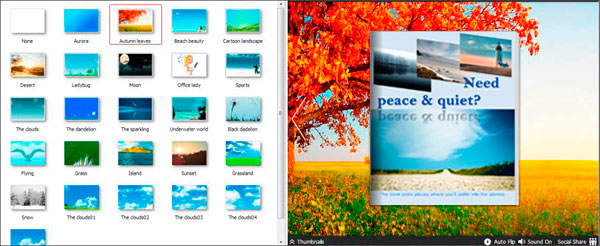
To make your book more attractive and lively, you can apply animated background which called "Scene" in the flip program. There are many pre-designed scenes for you to choose and use directly, such as Autumn Leaves, Beach Beauty, Desert, Moon, Underwater World, Grassland, Snow, Clouds, etc.
At last, click "Apply Change" icon  to apply the settings (You won't preview the applied effect before clicking this icon).
